Hey folks, it’s Richard Jant here. Hey, we get this question a lot, and it’s kind of a basic one, but let’s talk about it. So, the question is, what is a shoe pattern, how to make it?
What is a Shoe Pattern?
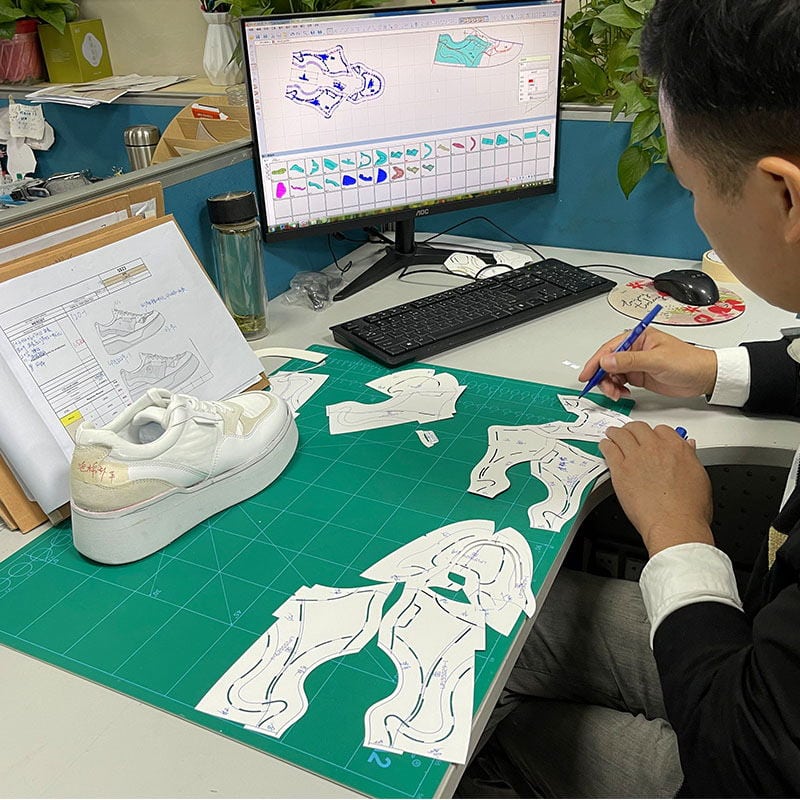
Well, the shoe pattern is something commonly seen in footwear manufacturer. It is the shape of the parts to make a shoe. So when you do a design, right, you would draw what is the shape of the shoe. But really, once you’re going to convert the shoe design into a 3D object, you need to take those lines and create the pattern pieces.
Let’s take a look over here. Okay, so here we remember we have our shoe last, right? And the shoe last, again, that is the three-dimensional form that our shoe was created from. And when you make your pattern drawing in 2D, the first thing that you have to do to make the shoe is convert that into a 3D shape. So, and that would be the pattern. So here’s an example of a pattern right here. So again, remember these are all five pieces, and eventually, they need to be transformed back into 3D.
So here’s the collarbone piece, but again, here we also, you know, this particular shoe has a heel counter, and then it has the heel counter interior reinforcing. So here’s the reinforcing piece that’s covered by the exterior heel counter, and that fits in right here on the rear center line. So we’ll put the counter there and then we’ll put the counter cover over there, okay?
This shoe has some fancy quarter-panel design, so here’s the quarter panel that has the eye stay built into it, right, and it has this little collar overlay panel, and that sits in right here. Actually, that sits right here, and that makes the two top eye stay components. Right, that sits there. It’s in that design.
Here you know, I showed you this was the toe tip sort of reinforcing. It here’s the toe tip piece that covers, and actually, this actually is an underlay, so this component sits underneath there like that. And then you know what you see here is just the vamp that’s basically part of that lining. Right, and then also, you’ve got to have your tongue foam, and then this tongue piece would be the face of the tongue, and the back of the tongue is all just you know.
But you can see they’re slightly different size from each other, right, because the bone is a little bit smaller. But I guess that’s your tongue component that sits there, and then this is the last bottom.
If you’re making a stroble shoe, or this would also be your footbed, right? This actually follows the bottom of the shoe last. Right, so again, this is the shoe pattern piece. And this is, you know, where the design of your shoe is color textured material, but also what the shape of all the individual parts.
So when you start looking at a more basic classic shoe, right, there’s not too many pattern pieces to it. Remember you’ve got the internal componentry. And then when you get into a shoe like this, where you know you’ve got die-cut components but also you’ve got these components that have edges that are rolled over, right? So you need to account for that edge rolling inside your pattern.
How to make a shoe pattern?
How to make a shoe pattern, you will need the following materials:
1.A shoe last (in the desired size and style)
2.Masking tape
3.Paperboard
4.Pencil
5.Ruler
6.Scissors
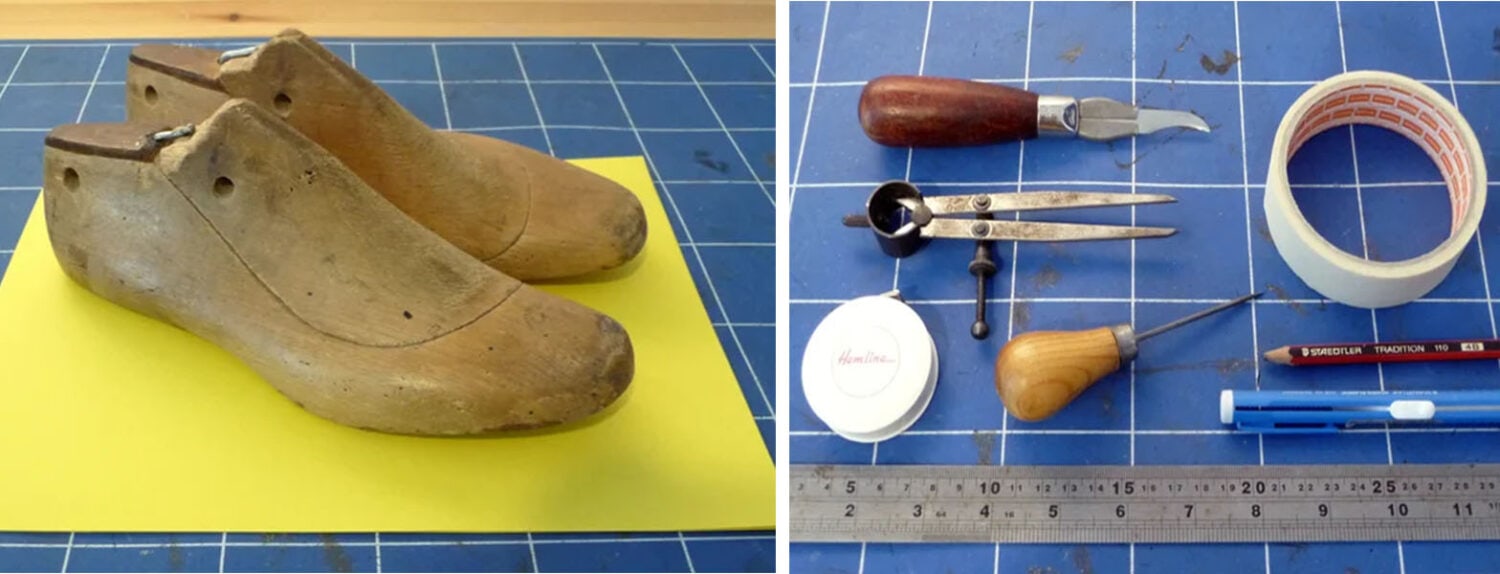
And now let me tell you how to make it step by step:
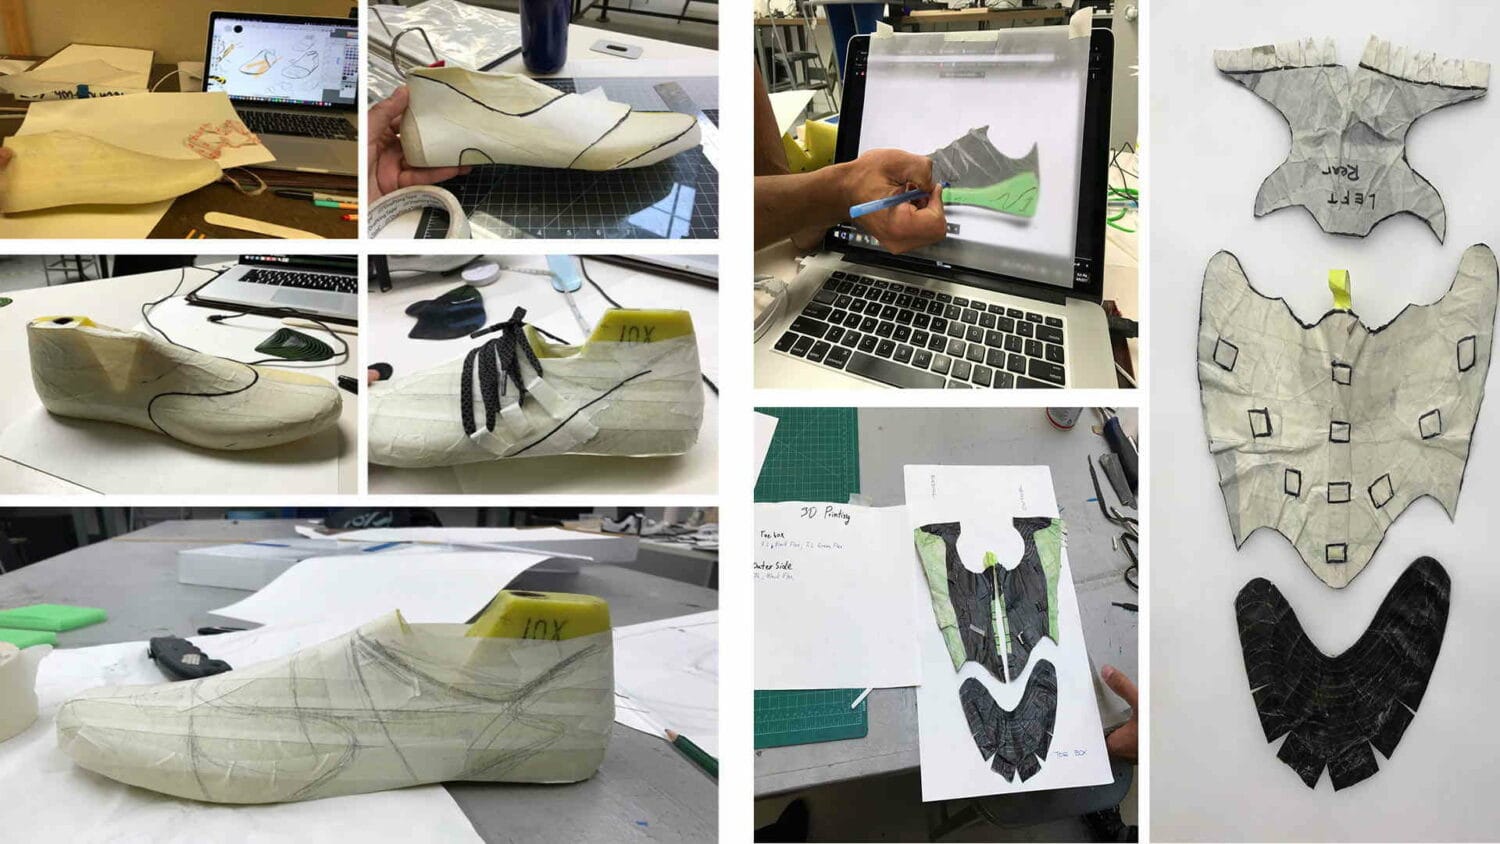
1.Tape the shoe last. Start by taping the outside of the shoe last with masking tape, working your way from the top of the last down to the toe. Then, tape the inside of the last, overlapping the tape slightly onto the outside tape.
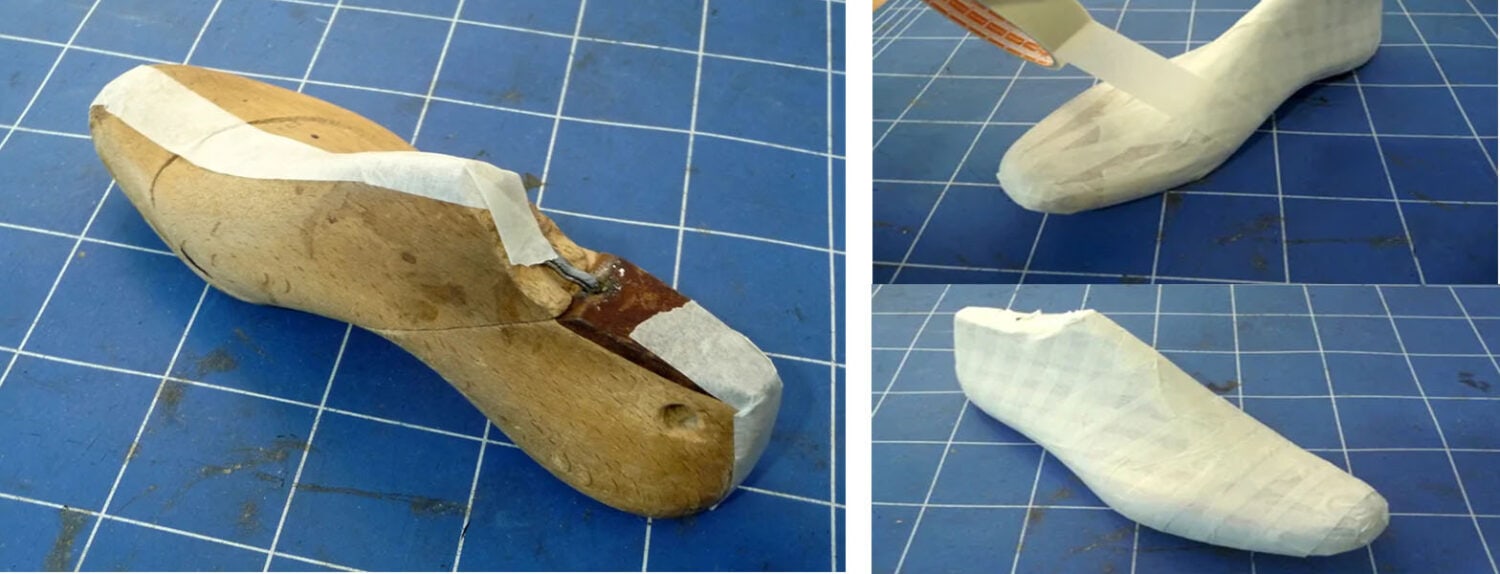
2.Flatten the tape pattern. Once the last is taped, cut along the bottom edge of the last to flatten the tape pattern.
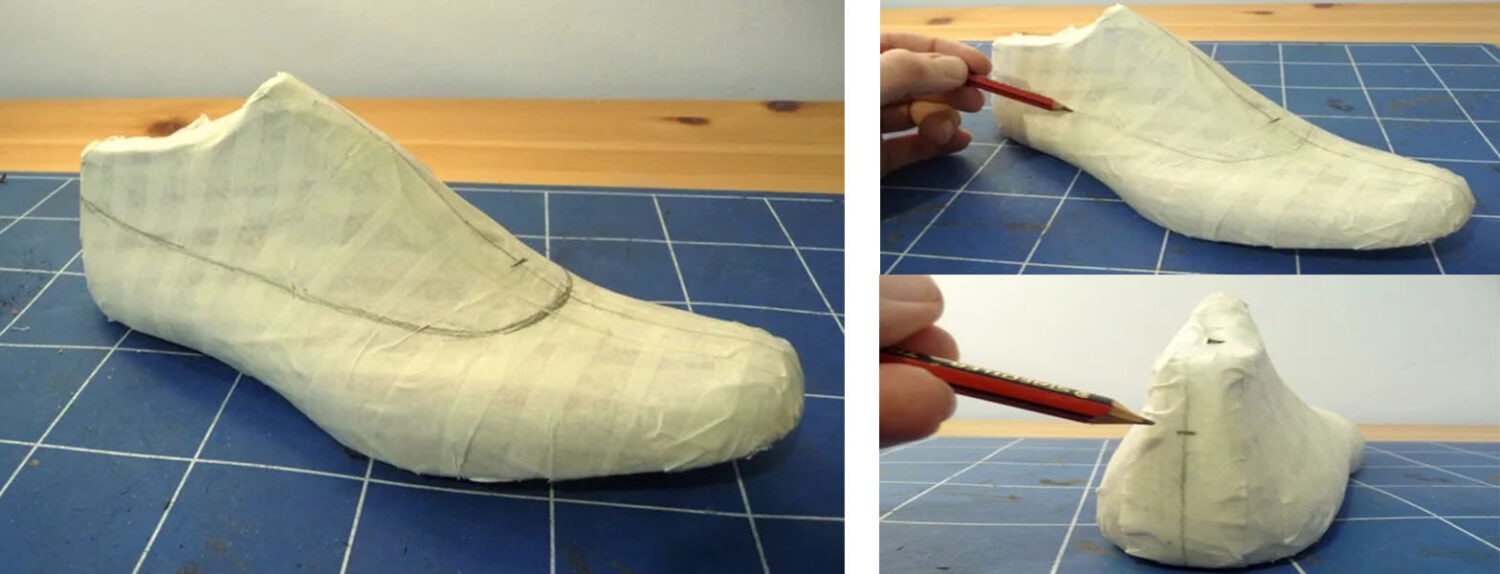
3.Transfer the tape pattern to paperboard. Place the tape pattern on a piece of paperboard and trace around it with a pencil. Cut out the paperboard pattern.
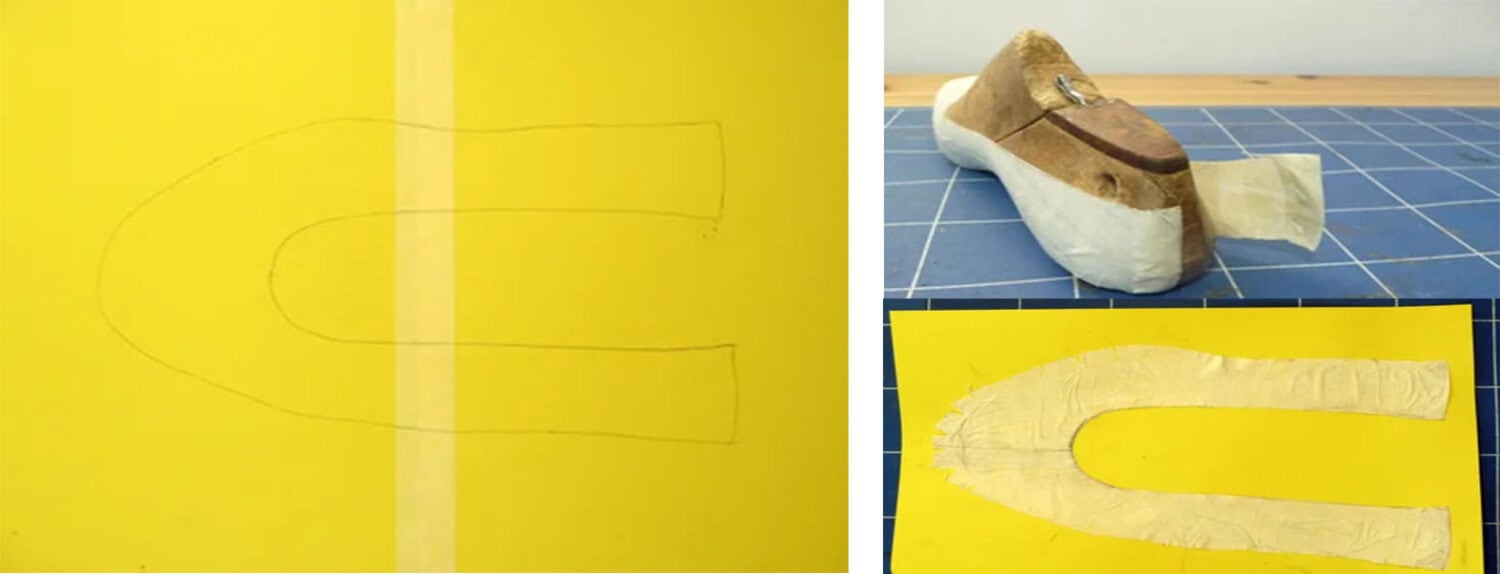
4.Add seam allowances. To add seam allowances, draw a new line around the outside of the paperboard pattern, 1/4 inch away from the original line. Cut out the new pattern.
5.Add grade rules. Grade rules are lines that are drawn on the pattern to help you cut out the different pieces of the shoe upper. To add grade rules, draw a line down the center of the pattern, from the top of the last to the bottom. Then, draw a line perpendicular to the center line, at the point where the toe begins to curve. Finally, draw a line parallel to the center line, 1/4 inch away from the edge of the pattern.
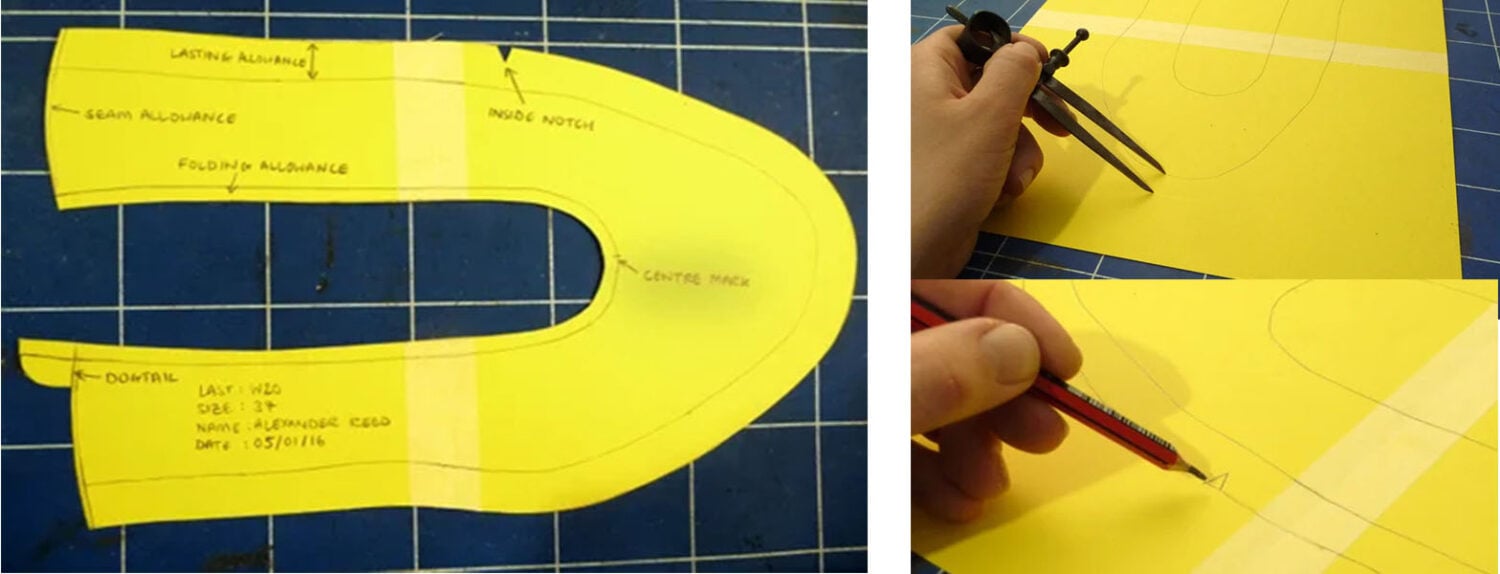
6.Label the pattern pieces. Once you have added the seam allowances and grade rules, label the different pattern pieces (e.g., vamp, quarter, tongue, lining).
My folks, your shoe pattern is now complete! You can use it to cut out the different pieces of the shoe upper from your chosen material.
Suggested article: 8 Tips to Quickly Identify a Good Shoe Supplier

